Basics
There are many localizable features to the online form. You can change question verbiage, titles, watermarks, make questions required or optional, and show or hide certain questions.
What is the difference between the walk-in form and the online form?
The online form is commonly used for patients at home that want to schedule a specific time slot for when they will arrive at the facility. Although the reservation time is no guarantee of when the patient will be seen, it can be useful for patients who want to schedule something in advance and decrease their waiting time.
The walk-in form is commonly referred to by many customers as "curbside check-in". The walk-in form is used by patients that have already arrived at the facility. Patients are not booking a specified time slot, rather they are "getting in line" and will receive a projected treatment time based on how many patients are ahead of them waiting to be seen.
What does "localization" mean?
In short, "localization" is synonymous with "customization". Every facility starts with a default online form template that acts as a basic framework for the majority of our customers. The default template has many "global" elements that are universal across all forms - such as "What is your date of birth?". If you wish to edit these elements to have different wording, you are changing the "global" elements to be "local" to your facility. This is localizing - customizing universal default elements to be specific for your facility.
What can be localized?
The majority of the elements on the online form can be customized. Titles, headings, question verbiage, watermarks, tooltips, and disclaimers can all be localized.
The following help desk article will go page-by-page through the online form and explain which features on each page can be customized and how to do so.
Note: If you manage multiple locations/queues and want to make the same localizations for all of your facilities, save time by making edits at the parent level so that your changes cascade down to the child facilities.
Table of Contents:
Main Page
Success Page
Main Page
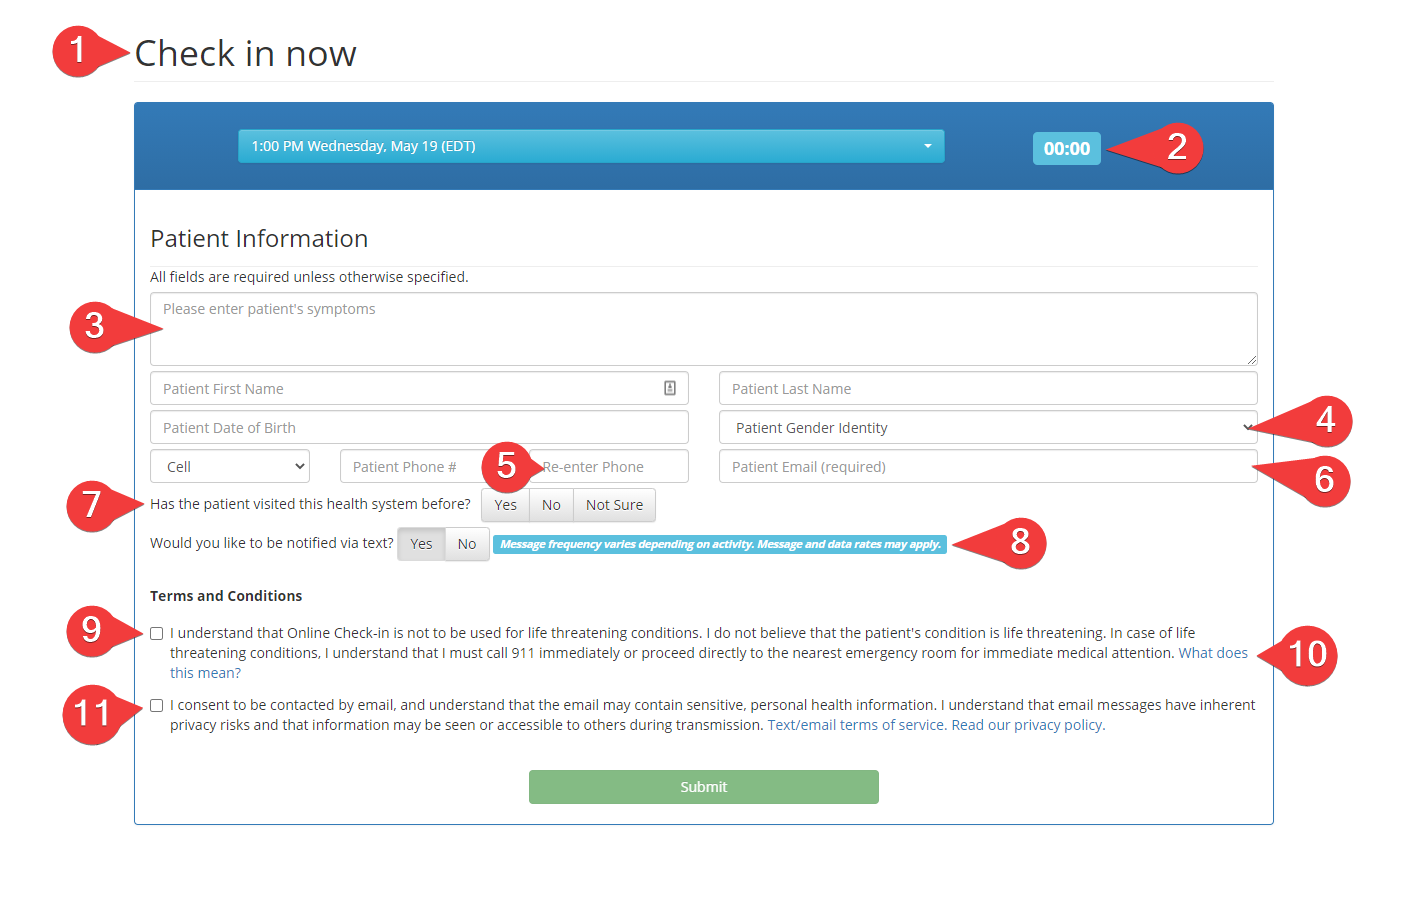
| Item 1 Page Header |
Localize the Page header. You can add HTML code, such as <h2></h2>, to add a subheading. | Go to Online/Walk-in Module > Localized Settings > Localized ID #3. |
| Item 2 Countdown Clock |
You can 'show' or 'hide' the countdown clock. The countdown clock does not serve any purpose other than imposing a sense of urgency on the patient. If the countdown clock gets down to 0 seconds, the patient will still be able to submit the form - the countdown clock is a purely UI feature. | Go to Online/Walk-in Module > Reservation Form Settings > Countdown Clock |
| Item 3 Chief Complaint Field |
You can 'show' or 'hide' the chief complaint field. If it is shown, then it is required for patients to fill it out. | Go to Online/Walk-in Module > Reservation Form Settings > Chief Complaint |
| Item 4 Patient Gender Label |
Localize the watermark for the patient gender field. Some examples of what you might localize it to: 'Patient Sex', 'Patient Gender Identity', 'Assigned Sex at Birth' | Go to Online/Walk-in Module > Localized Settings > Localized ID #50. |
| You are able to add more gender identities for your patients to choose from. | Go to Online/Walk-in Module > Reservation Form Settings > Patient Gender > press the blue plus button | |
| Item 5 Re-enter Phone Number |
You can 'show' or 'hide' the re-enter phone number field. A lot of facilities decide to show this field to act as verification that they have the correct phone number on file. | Go to Online/Walk-in Module > Reservation Form Settings > Re-enter Phone Number |
| Item 6 Email Field |
You can 'show' or 'hide' the email field. If you decide to show the field, you can make it 'optional' or 'required'. | Go to Online/Walk-in Module > Reservation Form Settings > Email Field |
| Item 7 First Time Visit |
Localize the first-time visit question. If you want to ask a different yes/no question, you can localize the question to be something completely different. Example: Have you tested positive for COVID in the last two weeks? | Go to Online/Walk-in Module > Localized Settings > Localized ID #4. |
| You can 'show' or 'hide' the first-time visit question. | Go to Online/Walk-in Module > Reservation Form Settings > Visited Before | |
| Item 8 SMS Disclaimer |
Localize the SMS Disclaimer. | Go to Online/Walk-in Module > Localized Settings > Localized ID #5. |
| Item 9 Terms & Conditions #1 |
Localize the Terms and Conditions verbiage. | Go to Online/Walk-in Module > Localized Settings > Localized ID #6. |
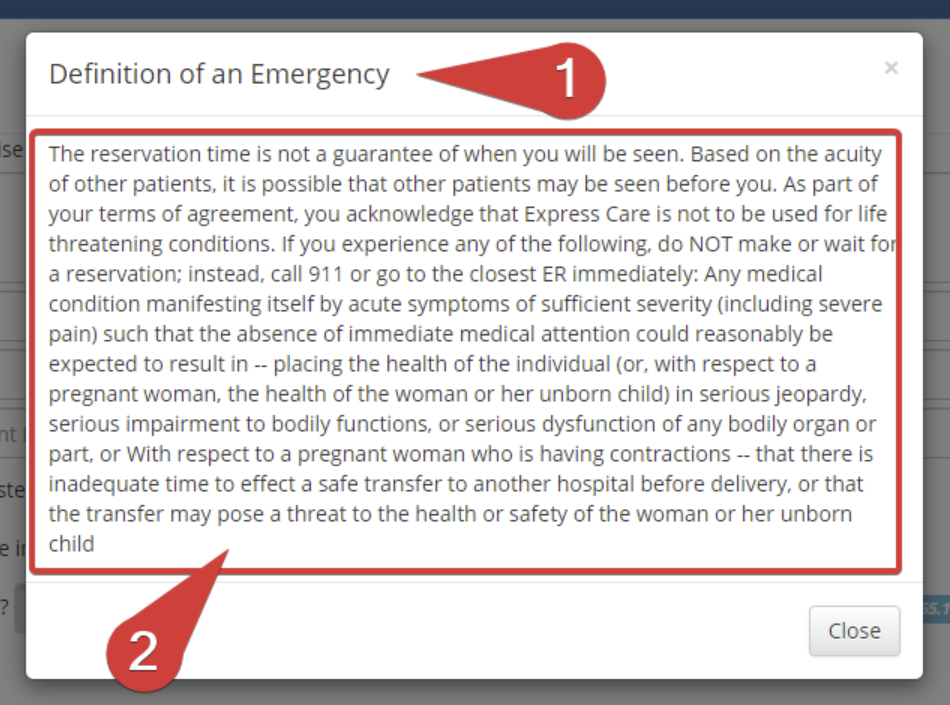
| Item 10 'What does this mean?' Modal title (1) |
Localize the title (1) that shows in the modal when a user clicks the 'what does this mean?' hyperlink. View the screenshot above as an example of what the modal looks like. | Go to Online/Walk-in Module > Localized Settings > Localized ID #49. |
|
Item 10 'What does this mean?' Modal content (2) |
Localize the content (2) that shows in the modal when a user clicks the 'what does this mean?' hyperlink. View the screenshot above as an example of what the modal looks like. | Go to Online/Walk-in Module > Localized Settings > Localized ID #48. |
|
Item 11 |
Localize the Terms and Conditions verbiage. | Go to Online/Walk-in Module > Localized Settings > Localized ID #7. |
Note: If your facility has 'Embedded Intake' activated, after the patient hits 'Submit' they will see a transition page that will take them to complete their registration forms. To localize the message on this transition page go to Online/Walk-in Module > Localized Settings > Localized ID #47.
Success Page
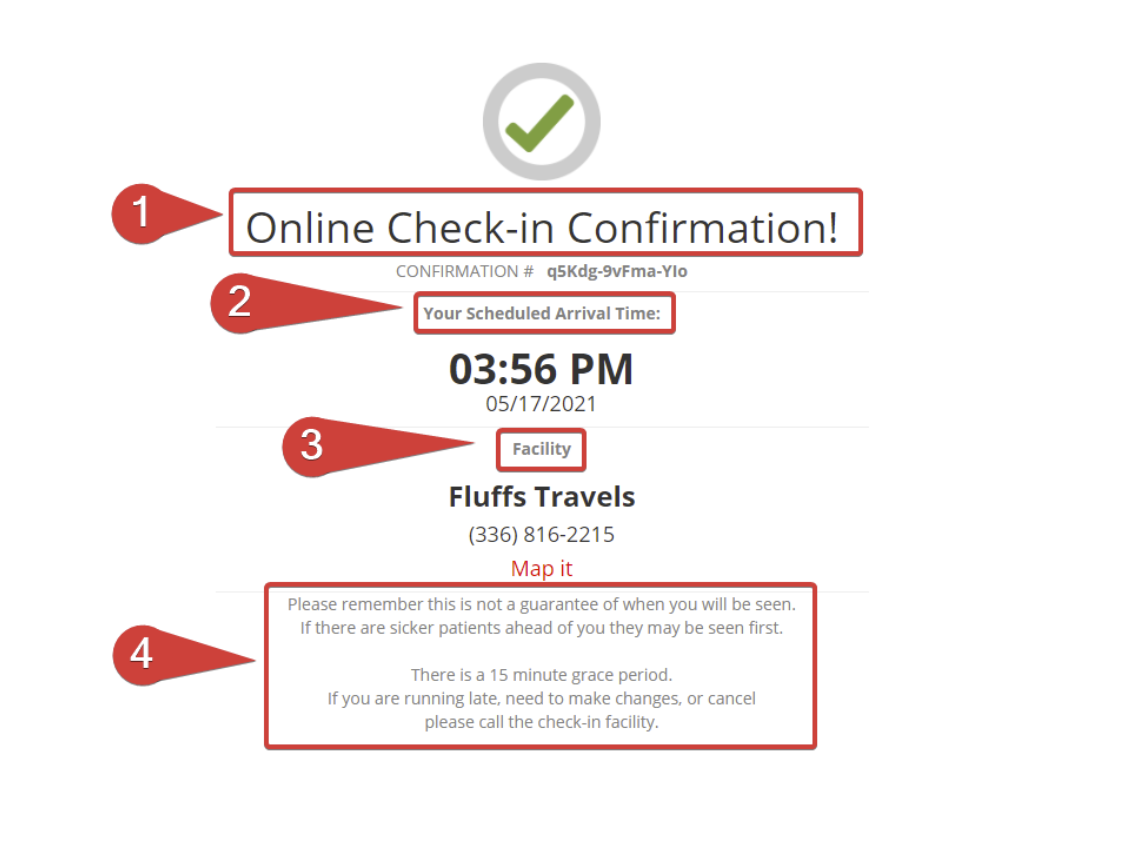
| Item 1 Success Page Header |
Localize the Success Page Header. | Go to Online/Walk-in Module > Localized Settings > Localized ID #8. |
| Item 2 Reservation Time Caption |
Localize the success page reservation time caption. | Go to Online/Walk-in Module > Localized Settings > Localized ID #9. |
|
Item 3 |
Localize the success page facility caption. | Go to Online/Walk-in Module > Localized Settings > Localized ID #10. |
| Item 4 Instructions |
Localize the success page instructions. | Go to Online/Walk-in Module > Localized Settings > Localized ID #11. |